

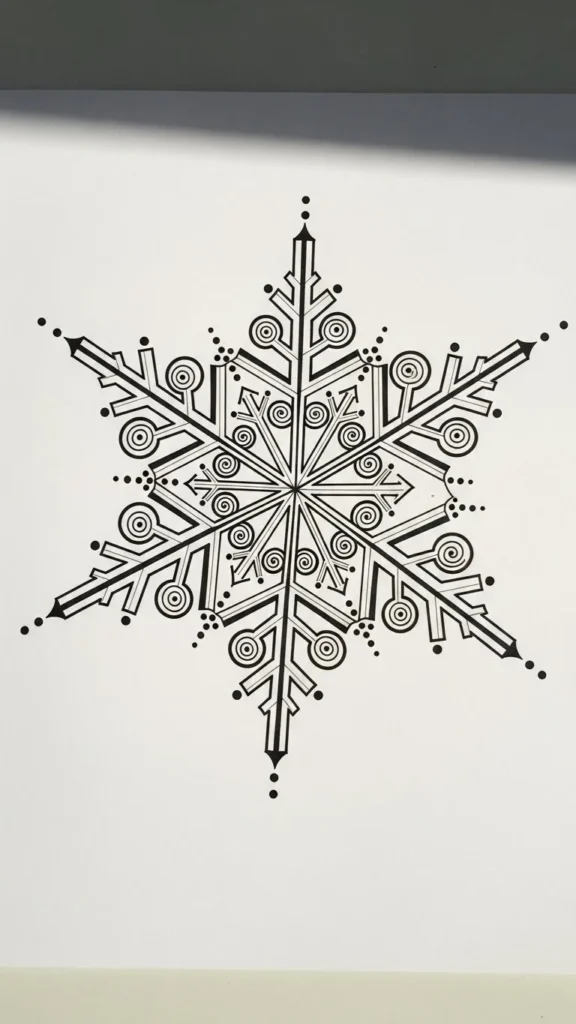
Designing a snowflake tattoo is such a magical process—especially when you learn how to balance every line, branch, and tiny detail with perfect symmetry. Whether you’re creating your own tattoo reference, sketching for fun, or planning a winter-themed art project, this guide walks you through every step in a fun, simple, and visually inspiring way.
Start With a Strong Foundation
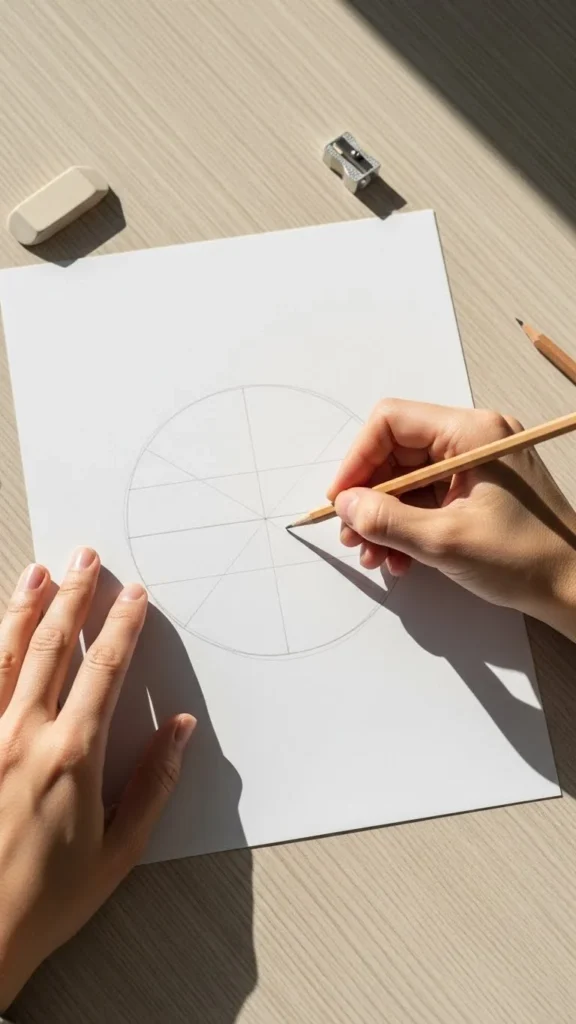
Every beautifully drawn snowflake begins with a simple structure. Think of this step as the blueprint of your design.
Begin by drawing a perfect circle. This will act as your guide to keep everything even from the center outward. Don’t worry about making it flawless—your lines will eventually be erased. What matters most is placement.
Inside the circle, draw six straight lines radiating outward like spokes on a wheel. Snowflakes naturally form with six points, so this layout keeps your design realistic and balanced.
Build Out the Main Branches
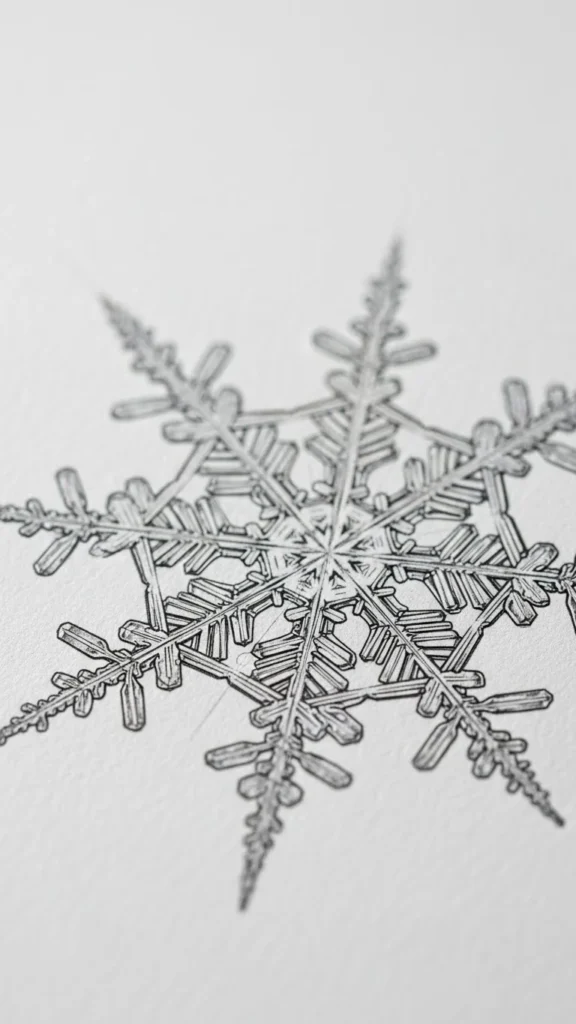
Once your basic framework is set, it’s time to create the signature snowflake look. These main branches should be noticeable but elegant.
Start at the center and thicken each line slightly as you work outward. Then add small V-shaped branches at the ends—they should mirror each other for perfect symmetry.
Want a cleaner look? Keep the tips sharp and minimal. Prefer something dreamy? Add tiny curls or soft edges.
Here are a few style ideas:
- Classic sharp crystal look
- Soft, frosted winter style
- Intricate lace-inspired branches
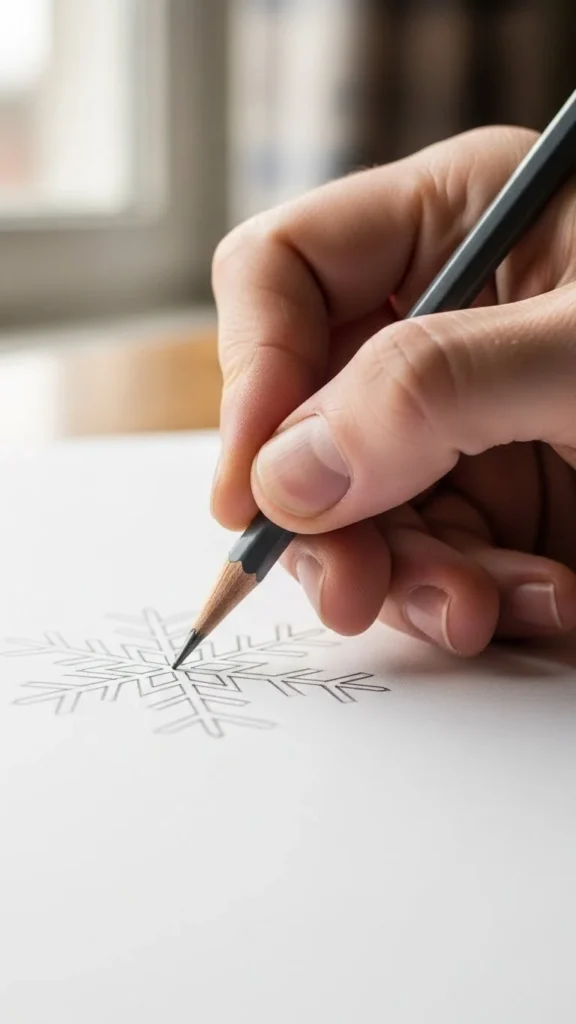
Add Beautiful Micro-Details
Tiny details make a snowflake tattoo feel truly artistic. They also help bring more personality to your final design.
You can add:
- Mini diamonds along the branches
- Dot clusters for a frosty look
- Small geometric shapes
- Leaf-like accents
- Soft curves or snow-dust patterns
Just make sure each detail you add is reflected across all six sides. What you do on one branch, repeat on the others to keep your symmetry flawless.
Pro tip: Step back from your drawing every few minutes to check balance. This keeps you from drifting off-center as you add layers.
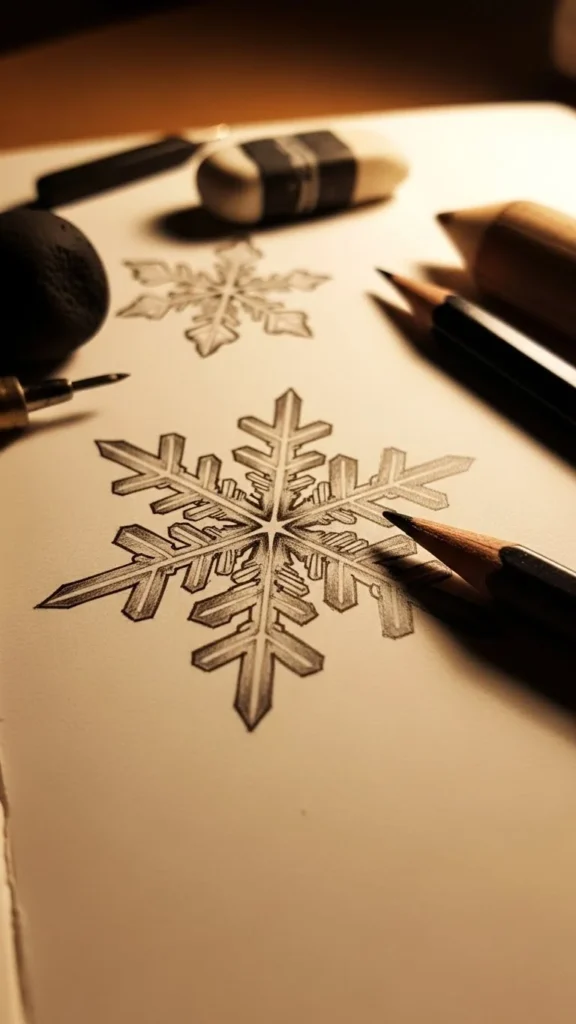
Refine, Clean, and Soften Your Lines
Once your structure and details are complete, it’s time to polish the drawing.
Erase all guiding circles and original lines. Then go over the final snowflake with a smooth, confident stroke—thickening areas where you want extra emphasis.
If you’re preparing this as a tattoo design, make sure:
- Your lines are clear
- Shapes are well-defined
- There’s enough negative space
- Details aren’t too tiny to ink cleanly
Want a softer style? Add gentle shading. Prefer a crisp, modern tattoo look? Stick to bold lines.
Customize the Snowflake to Match Your Style
The best part about drawing a snowflake tattoo is the creative freedom. Even though all snowflakes share the same natural structure, each one can be completely unique.
Try customizing it with:
- A gemstone center to add elegance
- Soft gradient shading for a frosted effect
- Tiny stars or sparkles to make it whimsical
- Additional mini snowflakes around the main design
- Thin lace-like elements for a delicate aesthetic
You can even create a cluster of snowflakes for a sleeve or a minimalist line of micro flakes for a subtle tattoo.
Whatever your vision, keeping symmetry in mind ensures the final result looks clean, polished, and intentional.
Final Touches Before Turning It Into a Tattoo
If this drawing is meant for a tattoo artist, you can go the extra mile:
- Scan your design or take a sharp photo
- Adjust the line weight digitally if needed
- Test different sizes to make sure the details hold up
- Create a black-and-gray version and a simple outline version
This helps the tattoo artist apply your design cleanly and gives them a precise roadmap to follow.
Takeaway
Drawing an elegant snowflake tattoo is all about structure, detail, and a little personal creativity. Once you understand symmetry, the rest feels like playing with shapes and textures.
If this inspired you, save this tutorial for later so you can practice or reference it the next time you’re creating winter-inspired art!

Leave a Reply