

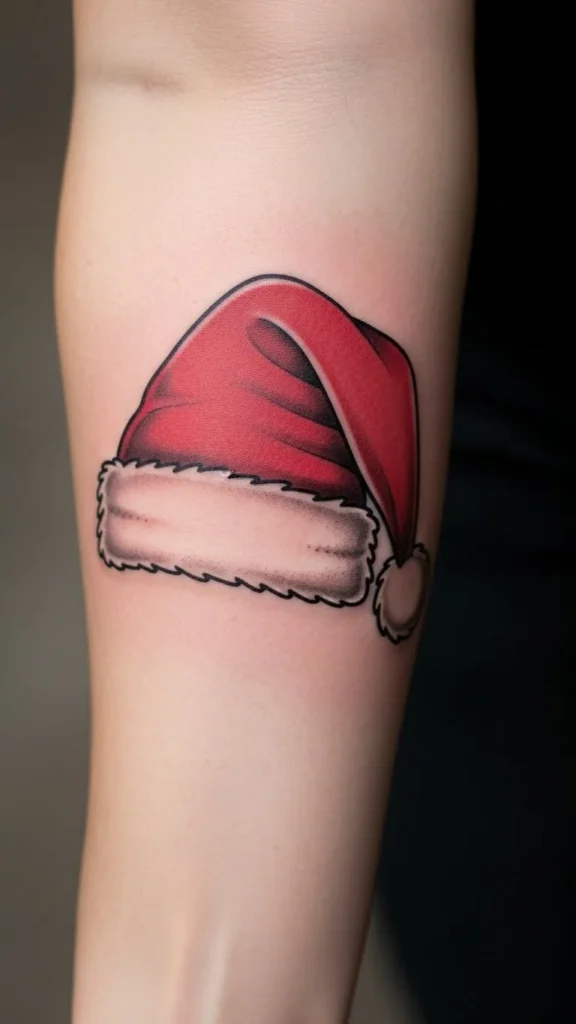
Nothing says cozy holiday charm quite like a Santa hat tattoo. It’s playful, nostalgic, and instantly festive—without feeling over-the-top. When you add soft shading, that simple hat transforms into something warm, dimensional, and surprisingly elegant. Whether you’re sketching ideas for yourself or designing flash art, this step-by-step guide will help you create a cute Santa hat tattoo that feels gentle, balanced, and timeless.
Start With the Right Santa Hat Shape
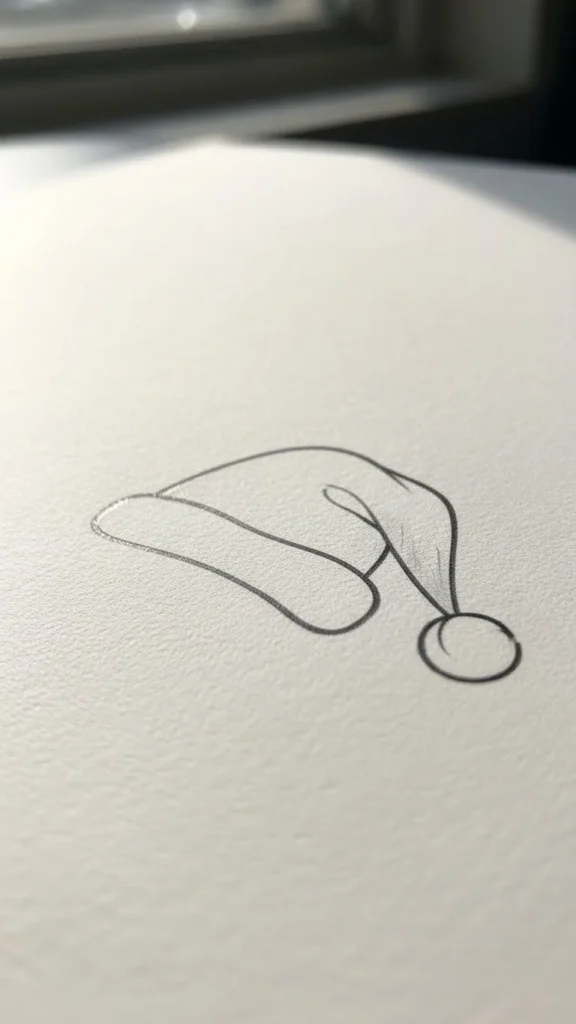
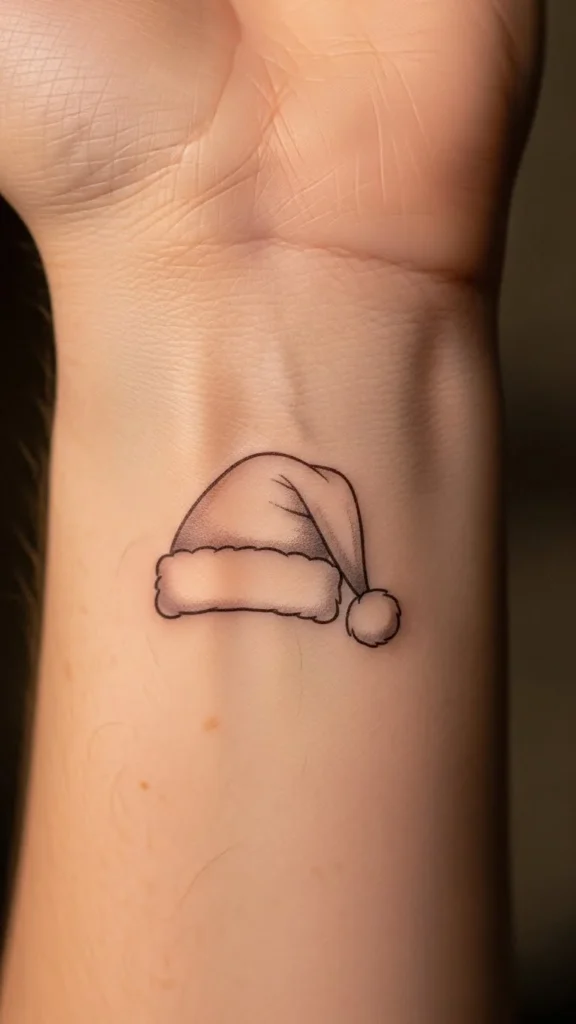
Before you think about shading, the shape needs to feel right. A cute Santa hat tattoo works best when it looks soft and slightly slouchy—not stiff or overly sharp.
Begin with a simple outline:
- Draw a curved triangle shape that leans slightly to one side
- Add a fluffy brim at the bottom using rounded bumps
- Finish with a soft pom-pom at the tip
Keep your lines light at this stage. You want flexibility to adjust proportions without committing too early.
Helpful tip:
- Slight asymmetry makes the hat feel more natural and cozy
- Avoid sharp points—rounded edges create a friendly look
Choose a Soft Shading Style (Less Is More)
Soft shading is what gives your Santa hat tattoo its charm. Instead of harsh contrast, aim for gentle gradients that feel airy and smooth.
Great shading options include:
- Light gray wash shading
- Soft dotwork blended lightly
- Pencil-style gradients for tattoo planning
Focus your shading in natural shadow areas:
- Under the brim fold
- Where the hat bends or droops
- Beneath the pom-pom
Leave some areas untouched. Skin breaks or negative space help the design breathe and prevent it from looking heavy.
Quick reminder:
- Build shading slowly in layers
- Step back often to check balance
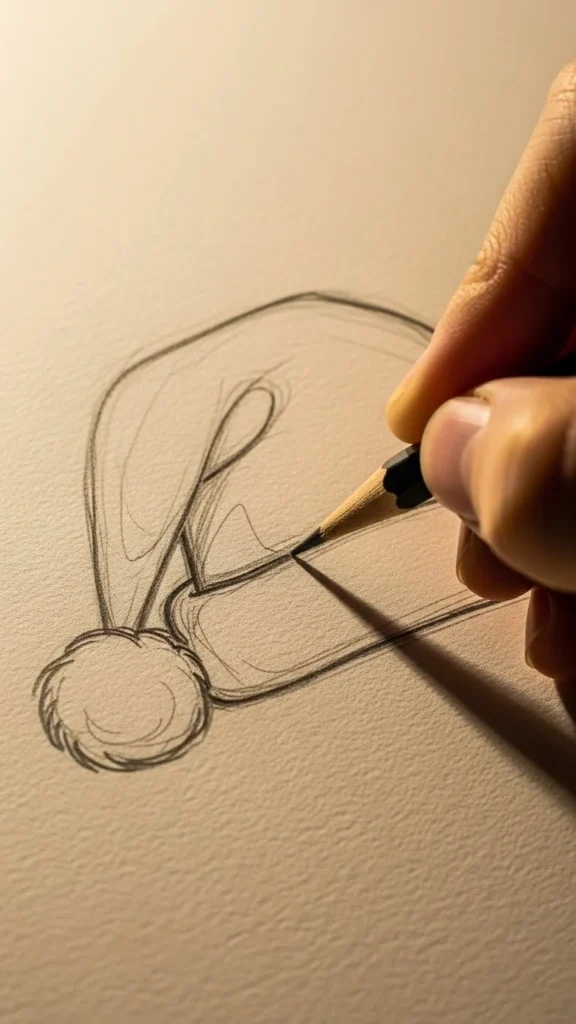
Make the Brim Look Fluffy and Light
The brim is the coziest part of the design—and where many tattoos lose softness if overworked. Instead of outlining every bump, suggest texture with gentle shading and spacing.
How to do it:
- Use small curved strokes instead of solid lines
- Shade lightly where bumps overlap
- Let some edges fade naturally
This technique keeps the brim looking plush without turning it into a solid block of ink.
Design tip:
- Fewer lines = softer result
- Think “cloud-like,” not rigid
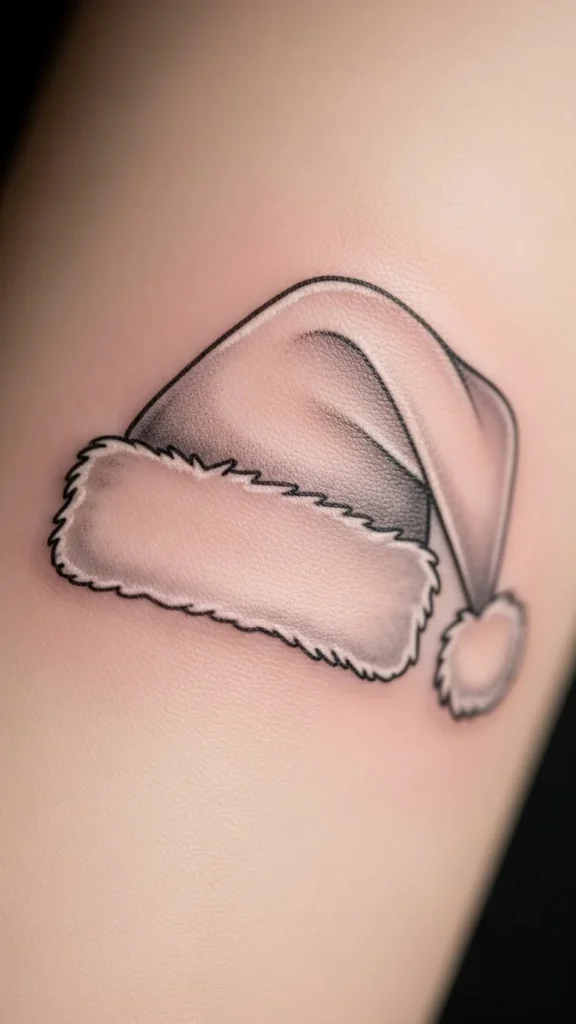
Add Depth Without Making It Heavy
Depth doesn’t require dark shadows. In fact, a cute Santa hat tattoo looks best when it feels light and wearable.
To create depth:
- Shade along the inner curve of the hat
- Slightly darken areas where fabric overlaps
- Keep the top portion lighter to suggest soft fabric
If you’re unsure, stop early. You can always add more shading later, but removing it is much harder.
Pro tip:
- Imagine where fabric would naturally fold
- Use reference photos of real hats for realism
Keep Linework Clean and Delicate
Clean linework is the backbone of a soft tattoo design. Thick, bold lines can overpower shading, so opt for thin, consistent strokes.
Best practices:
- Use lighter pressure for outlines
- Break lines subtly in softer areas
- Avoid outlining every detail
This approach helps the tattoo age better and keeps it looking gentle over time.
Optional style upgrades:
- Add tiny sparkles around the hat
- Pair with a small heart or star
- Combine with initials or a date
Test Placement Before Finalizing
Placement can completely change the feel of your Santa hat tattoo. Smaller, softly shaded designs shine best in areas where curves enhance the shape.
Popular placements:
- Ankle
- Wrist
- Behind the ear
- Shoulder or collarbone
Before committing, try a stencil or temporary transfer to see how the shading flows with movement.
Final Touches That Make It Feel Special
Once the design feels balanced, do a final pass:
- Smooth transitions between light and shadow
- Check symmetry without forcing perfection
- Remove unnecessary lines
Sometimes the cutest tattoos are the simplest ones. Trust the softness you’ve built.
Your Cozy Takeaway
A cute Santa hat tattoo with soft shading is all about restraint, warmth, and gentle detail. Focus on rounded shapes, light gradients, and clean lines—and you’ll end up with a festive design that feels cozy year after year.
Save this guide for later or pin it for your next tattoo idea!

Leave a Reply