

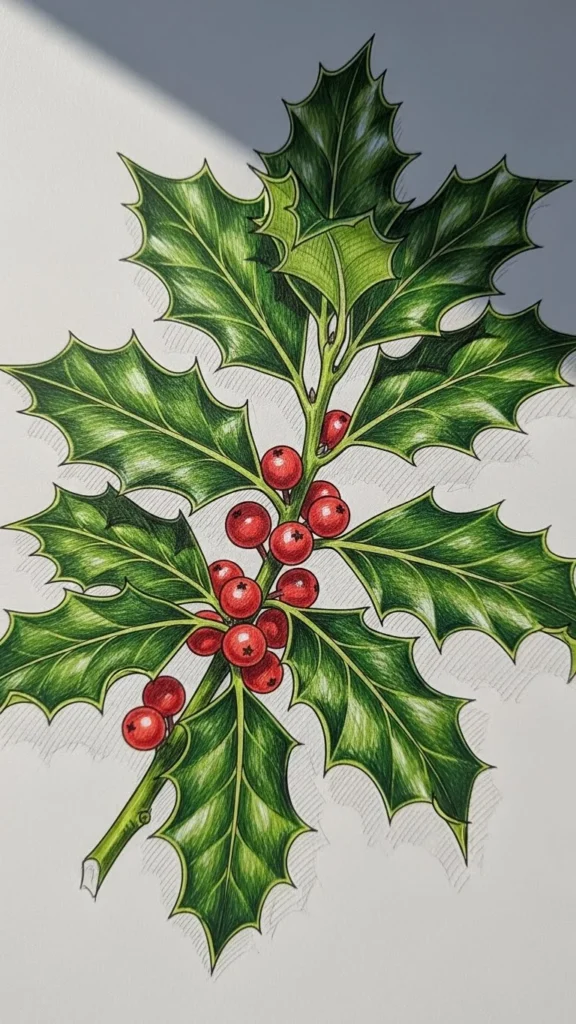
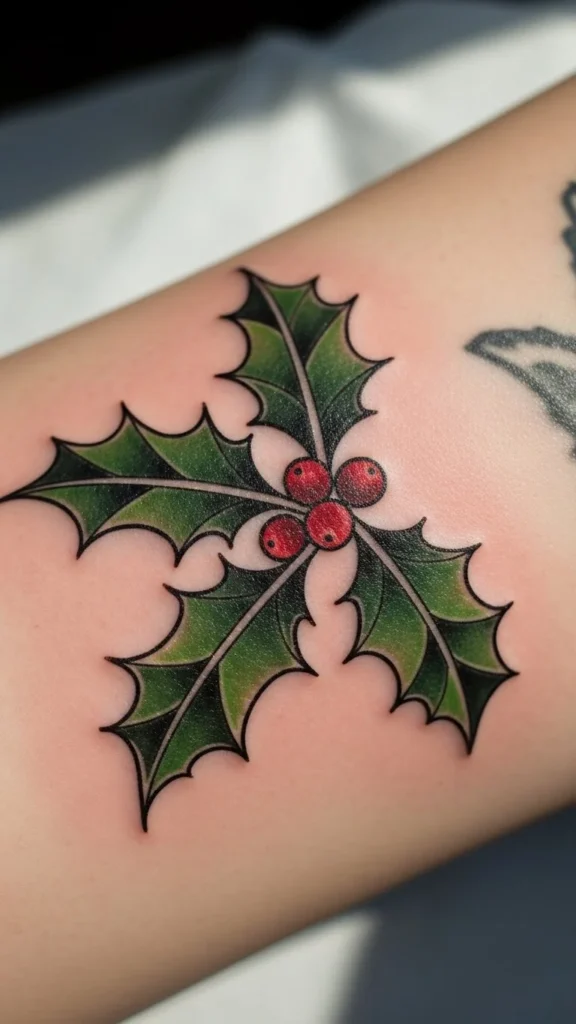
Holly leaf tattoos are timeless. They feel festive, bold, and full of meaning without being overcomplicated. The sharp points of the leaves paired with smooth curves make this design perfect for anyone who loves clean linework and bright color. Whether you’re sketching your first concept or refining a final stencil, getting the details right is what makes a holly tattoo truly pop.
In this guide, you’ll learn how to design a bright holly leaf tattoo step by step, with tips that keep your lines crisp and your colors vibrant. Everything is broken down simply, so you can save this for later and come back whenever inspiration hits.
Understand the Shape of a Holly Leaf
Before you even pick up a pencil, it helps to study the natural structure of holly leaves. They look simple at first glance, but their balance is what makes them striking.
Holly leaves usually have:
- A smooth central spine
- Sharp, evenly spaced points along the edges
- A slightly curved overall silhouette
Spend a few minutes looking at real references. Notice how the points aren’t random. They alternate gently from side to side, which keeps the leaf looking organic instead of stiff.
Quick tip: Avoid overdoing the spikes. Too many sharp points can make the tattoo look crowded, especially at smaller sizes.
Sketch a Clean Base Outline
The outline is the foundation of your tattoo. Clean lines start here.
Begin with a light sketch:
- Draw a soft center line first
- Add the outer leaf shape around it
- Place the points evenly on both sides
Keep your hand relaxed. Stiff strokes often lead to shaky lines later.
Once the shape feels right, refine it:
- Smooth out curves
- Sharpen the tips slightly
- Erase unnecessary guide lines
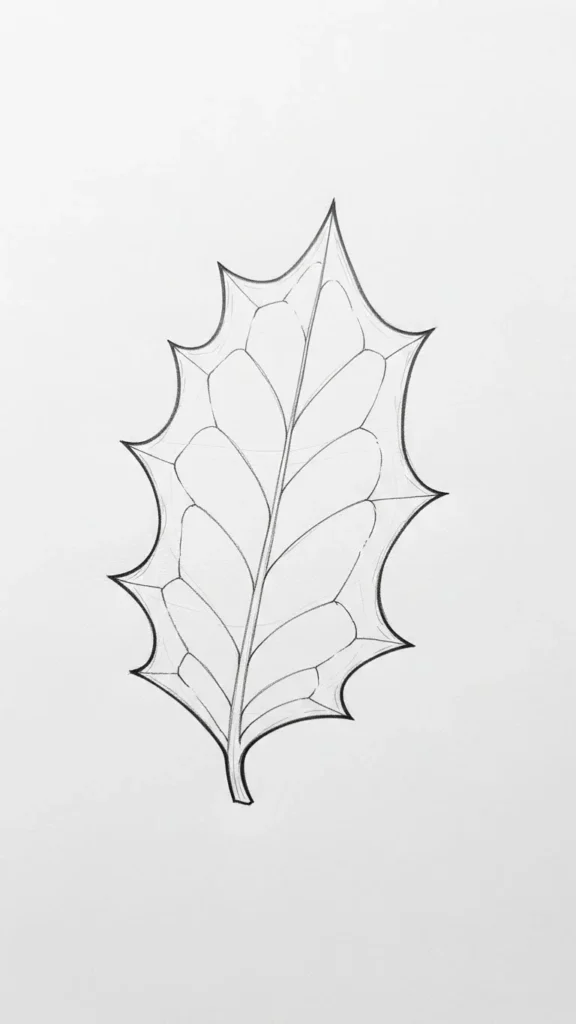
This stage isn’t about perfection. It’s about clarity. A clear outline makes everything else easier.
Refine Line Weight for a Tattoo-Ready Look
Line weight is what separates a flat drawing from a professional tattoo design.
For holly leaf tattoos, balance is key:
- Use slightly thicker outer lines for structure
- Keep inner veins thinner and softer
- Avoid heavy lines on every detail
This contrast helps the tattoo age better and keeps the design readable over time.
Helpful guideline:
- Small tattoos = simpler lines
- Larger tattoos = more room for detail
If the design feels too busy, remove one detail instead of adding more.
Choose Bright, Lasting Colors
Color is where holly tattoos really shine. Classic choices work for a reason, but you can still personalize them.
Popular holly color combinations:
- Deep green leaves with bright red berries
- Emerald tones with subtle lighter highlights
- Muted green for a softer, vintage feel
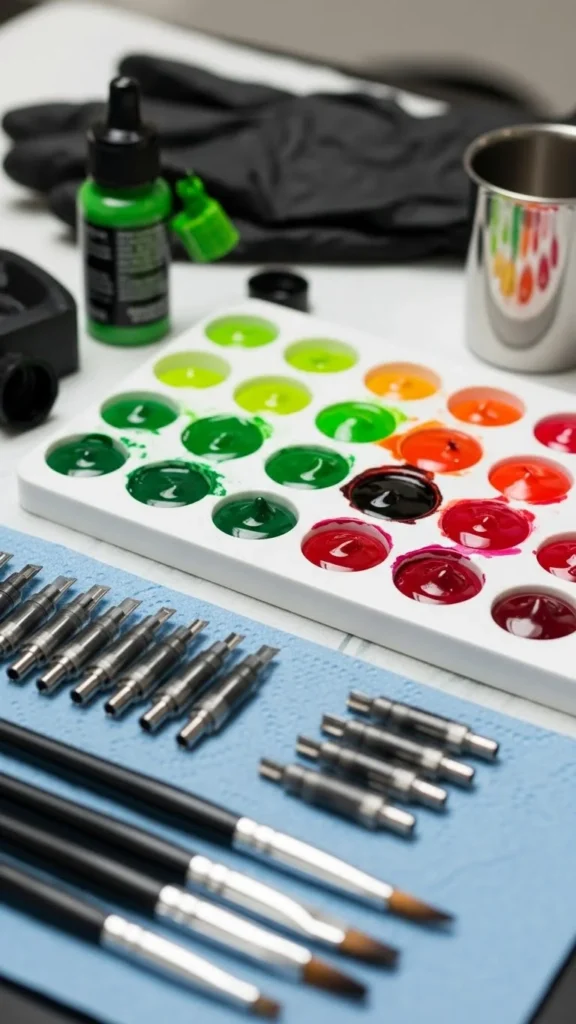
To keep colors looking fresh:
- Avoid muddy blends
- Leave small areas of skin break for brightness
- Use highlights sparingly
Clean color placement enhances the crisp linework instead of competing with it.
Add Simple Shading Without Losing Clean Lines
Shading should support the design, not overpower it. Holly leaves look best with light, controlled shading.
Try these techniques:
- Soft gradient shading from the center vein outward
- Minimal shadow near leaf edges
- Tiny highlights to suggest a glossy surface
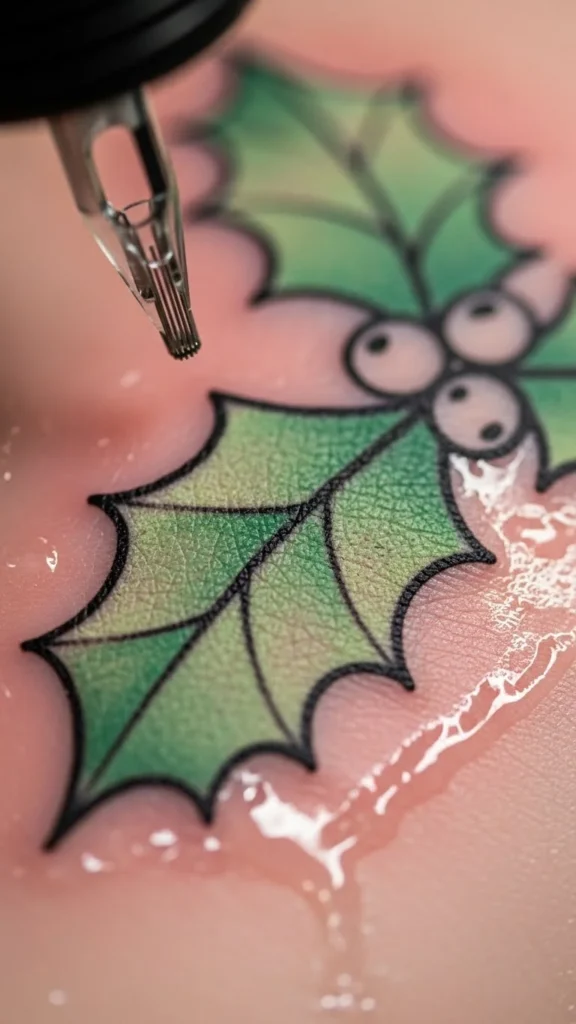
Skip heavy textures or complex patterns. Holly leaves already have strong visual interest on their own.
Decide on Placement and Size
Placement affects how clean your tattoo will look over time.
Holly leaf tattoos work well on:
- Forearms
- Ankles
- Shoulders
- Behind the arm or collarbone area
When choosing size:
- Smaller designs need fewer details
- Medium sizes allow better spacing
- Larger designs can include berries or ribbon accents
Always test the stencil placement. Move your arm naturally and check how the lines flow with your body.
Final Checks Before Tattooing
Before committing, do a quick final review:
- Are the lines smooth and confident?
- Is the spacing even?
- Does the color balance feel right?
If something feels off, trust that instinct. Small adjustments now prevent regrets later.
Final Takeaway
Creating a bright holly leaf tattoo with clean lines is all about simplicity, balance, and intention. Focus on the shape first. Refine your linework. Let color enhance the design instead of overpowering it.
If this guide helped spark an idea, save it for later and share it with someone planning their next tattoo. Clean designs never go out of style.

Leave a Reply