

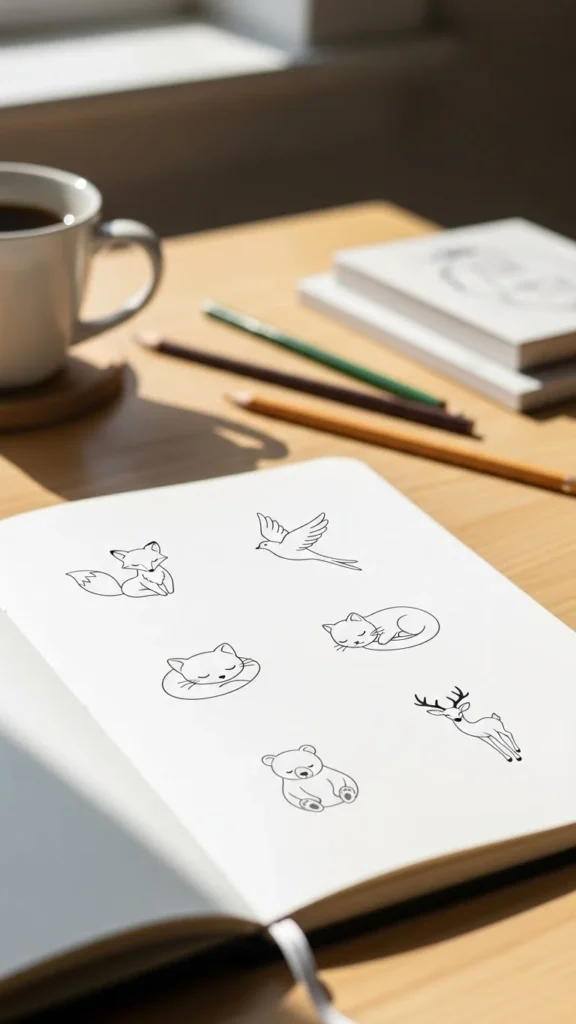
Tiny animal tattoos have a special kind of magic. They’re soft, playful, and full of personality—without taking over your skin. Whether it’s a sleepy cat, a hopping bunny, or a curious fox, small animal tattoos feel personal and timeless when done right. The secret isn’t fancy shading or complex lines. It’s simplicity, balance, and knowing when to stop.
If you’ve ever tried drawing tiny tattoos and ended up with something that looks cramped or messy, don’t worry. This guide walks you through clear, beginner-friendly steps to keep your animal tattoos cute, clean, and minimal—every single time.
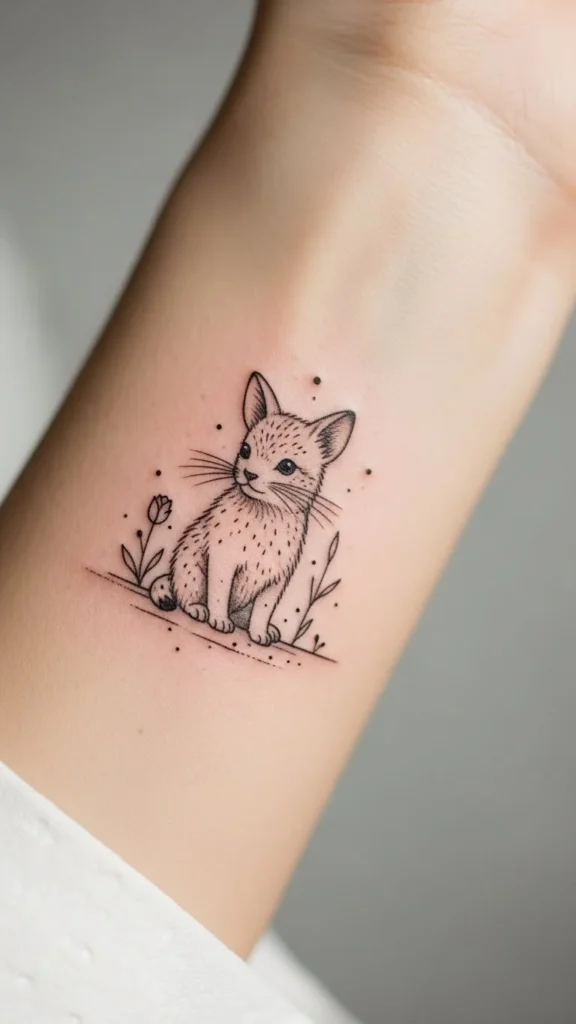
Start With the Right Animal (Simple Always Wins)
Not every animal works well at a tiny scale. The more complex the creature, the harder it is to keep it readable once it’s small.
Best animals for tiny tattoos:
- Cats, dogs, rabbits, foxes
- Birds in side view
- Fish with simple fins
- Bears, mice, or deer silhouettes
Avoid animals with lots of textures, spikes, or patterns. Tiny tattoos need strong shapes, not details.
Quick tip:
If you can recognize the animal using only its outline, it’s a great choice.
Break the Animal Into Basic Shapes
Before you draw anything detailed, think in shapes. Circles, ovals, and soft curves are your best friends.
Start by sketching:
- One circle for the head
- One oval for the body
- Simple lines for legs or tails
This approach keeps proportions cute and avoids stiff poses.
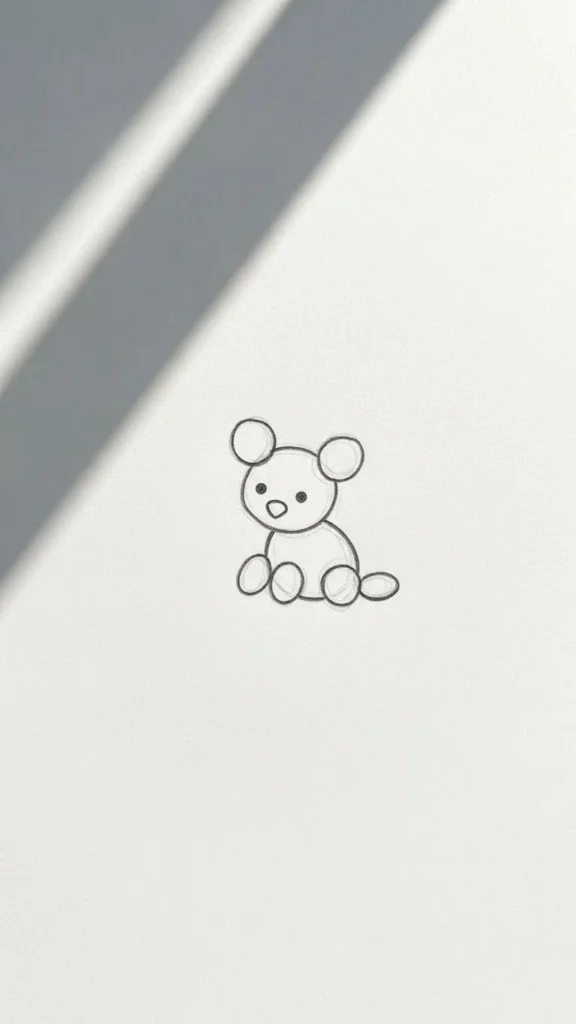
Why this works:
Rounded shapes naturally feel gentle and friendly. Sharp angles can make tiny designs feel harsh or cluttered.
Use Fewer Lines Than You Think You Need
Minimal tattoos live or die by line control. More lines do not mean more clarity.
Try this rule:
If a line doesn’t change the animal’s identity, remove it.
Focus on:
- One clean outline
- Tiny dots for eyes
- A single curved line for a mouth (or none at all)
Skip:
- Fur texture
- Inner ear details
- Multiple facial expressions
Less ink keeps the tattoo readable as it ages.
Choose the Cutest Pose (Still > Action)
Movement is exciting on paper—but risky in tiny tattoos. Static poses stay clear longer and feel calmer.
Cute, safe poses include:
- Sitting animals
- Curled sleeping positions
- Side profiles
- Front-facing heads
Design check:
Shrink your sketch to the size of a coin. If it still looks clear, you’re on the right track.
Keep Line Weight Light and Consistent
Heavy lines can overwhelm tiny tattoos. Ultra-thin, consistent strokes look cleaner and more delicate.
Best practices:
- Use a single line weight
- Avoid bold outlines mixed with thin ones
- Keep corners rounded
If you’re drawing digitally, test your brush size at actual tattoo scale. What looks thin on screen can print much thicker.
Skip Shading (Negative Space Is Enough)
Shading often muddies tiny tattoos. Instead, let empty space do the work.
Use:
- Open areas inside the shape
- Small gaps between limbs
- White space around the design
This keeps the design airy and helps it age gracefully.
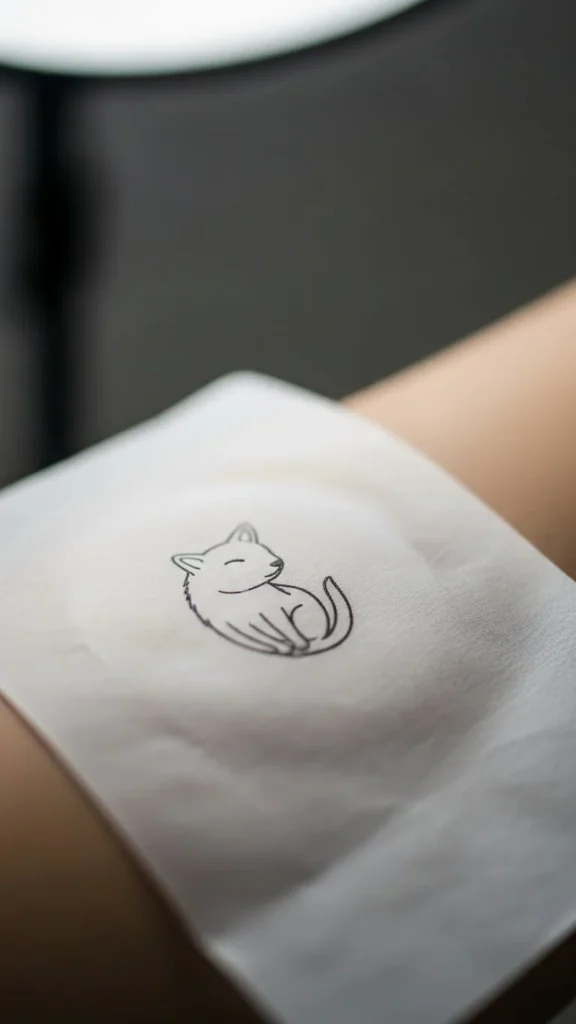
Test Placement Before Finalizing
Tiny tattoos are sensitive to placement. Curves, movement, and skin texture all matter.
Great spots for tiny animal tattoos:
- Wrist side
- Ankle
- Collarbone
- Behind the arm
- Upper shoulder
Always test your design:
- Print it at real size
- Place it on the body area
- Check how it looks from different angles
A cute design can lose its charm if placed awkwardly.
Final Touches That Make It Feel Intentional
Before calling it finished, ask yourself:
- Does this still look cute from far away?
- Are the lines confident and clean?
- Would removing one more detail help?
Sometimes the best improvement is erasing one last line.
Final Takeaway
Tiny animal tattoos shine when they’re simple, soft, and thoughtful. You don’t need complex detail to tell a story—just the right shape, a gentle line, and a bit of restraint. Start small, draw light, and let the cuteness speak for itself.
Save this guide for later, and try sketching one tiny animal today—you might be surprised how powerful minimal can be.

Leave a Reply