

Roses are timeless symbols of beauty, love, and elegance, making them perfect for hand tattoos. A rose hand tattoo can be subtle or bold, and it works for any style—from minimalist line work to vibrant, colorful designs. Whether you want a single bloom on your finger or a cluster across the back of your hand, these tattoos are versatile and meaningful. In this guide, we’ll explore 22 creative rose hand tattoo ideas, complete with practical tips for design and placement.
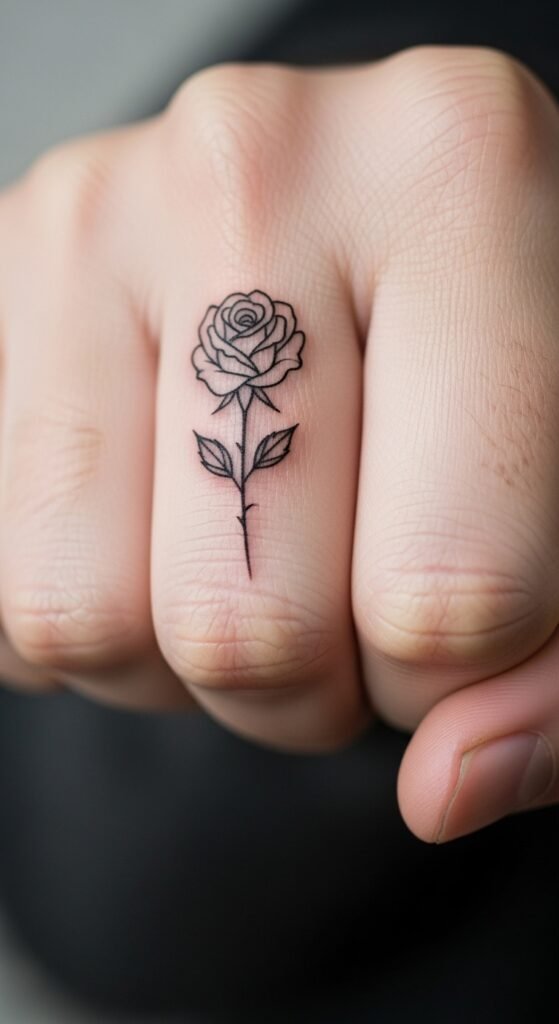
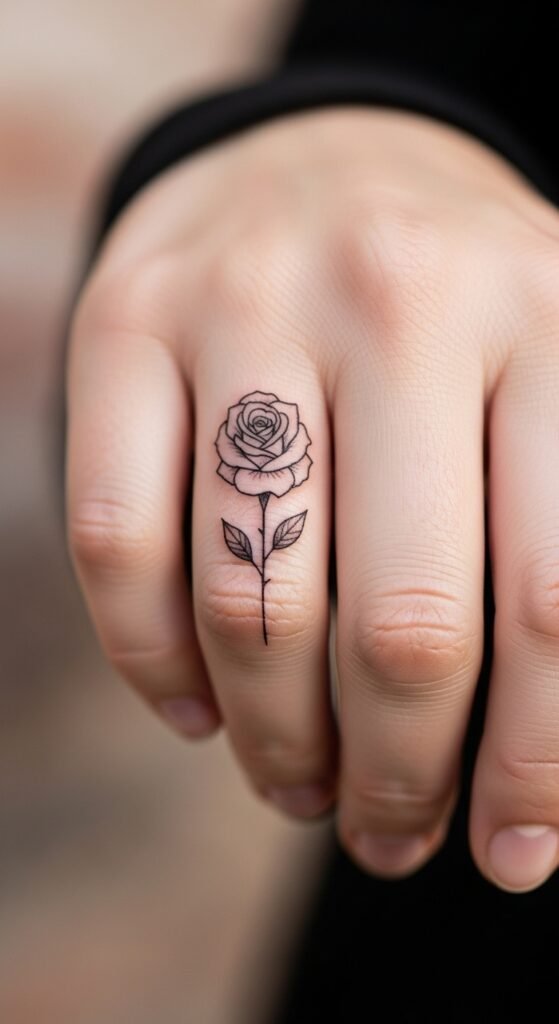
1. Single Finger Rose Tattoo
A single finger rose tattoo is simple but striking. Its small size makes it ideal for first-timers or those who prefer minimalism. You can place it on the side or top of the finger for a subtle touch. To save on cost, choose a black and gray design rather than full color. DIY planning tip: sketch the rose on tracing paper first to test placement. This allows for a confident tattoo session without wasting ink. Maintenance is easy—keep it moisturized and avoid friction from rings or gloves for the first few weeks.
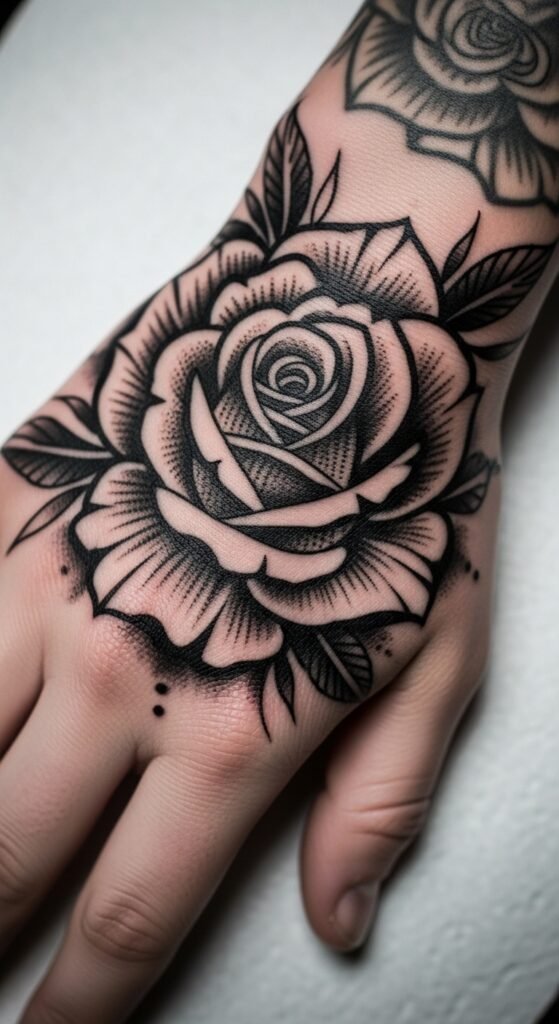
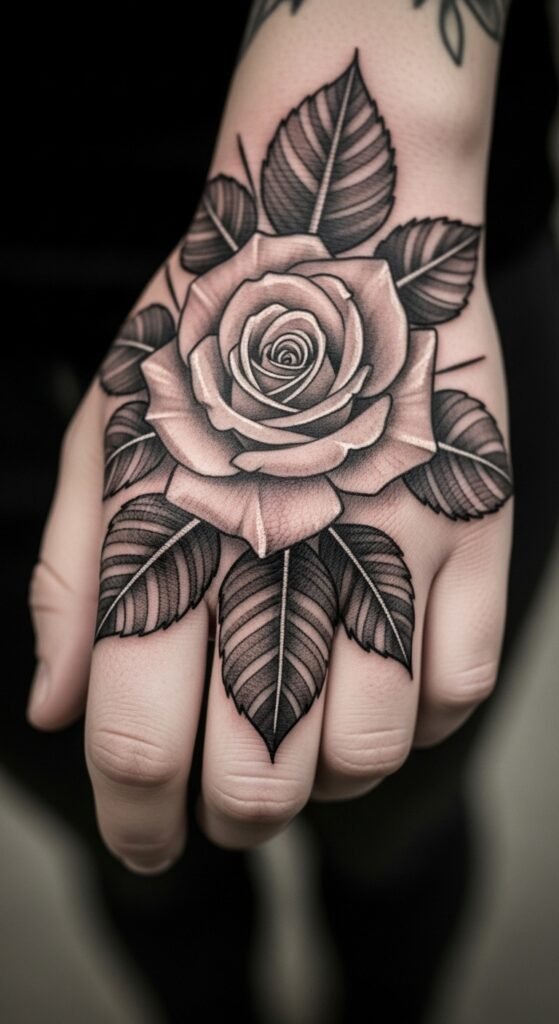
2. Full Back-of-Hand Bloom
A full back-of-hand bloom creates an eye-catching statement. It works well with intricate shading or bold outlines. If you’re on a budget, request the artist focus on black line work, which can later be colored in stages. This design allows flexibility for expansion—later, you could add vines or smaller flowers extending to your wrist. Make sure the size suits your hand; too large can overwhelm small hands. Practical tip: move naturally during the session to ensure the rose curves with your hand’s shape.
3. Minimalist Outline Rose
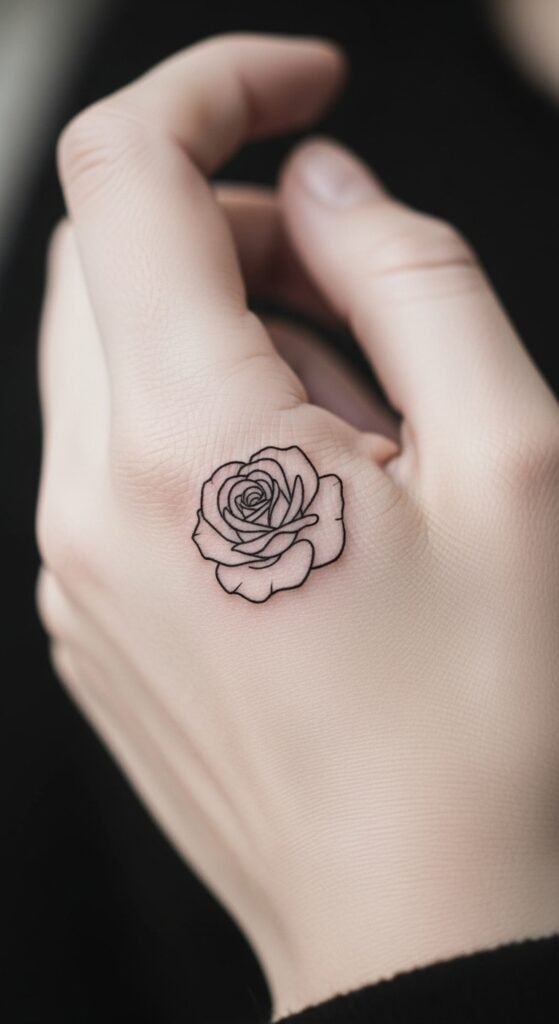
Minimalist tattoos are perfect for clean, subtle beauty. A minimalist outline rose can sit anywhere on the hand, from the thumb base to the pinky side. It’s quick to ink, budget-friendly, and easier to maintain. For DIY preparation, print reference images and trace them to visualize size and placement. Minimal shading reduces healing issues and keeps the design crisp. It’s also easy to layer with other small designs later without overcrowding your hand.
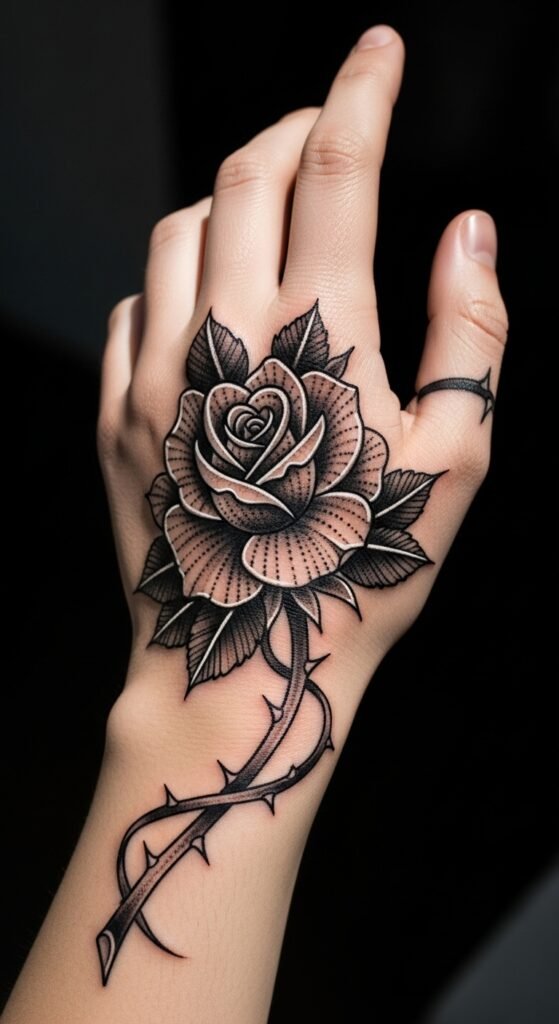
4. Rose With Thorns
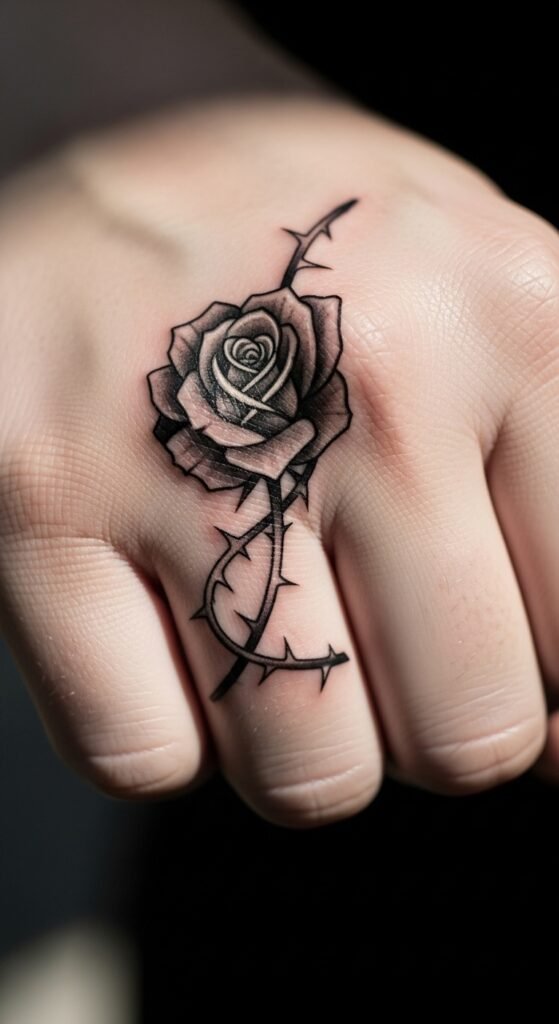
A rose with thorns adds symbolism—beauty with a hint of edge. You can keep the rose small or make it a wrist-to-hand design. Budget tip: use fine line thorns and leaves to reduce time in the studio. For DIY ideas, mark thorn placement lightly with a washable pen to ensure natural flow. This style looks impressive in black and gray or subtle reds for the petals. It’s a classic choice for someone wanting meaning in their tattoo.
5. Watercolor Rose
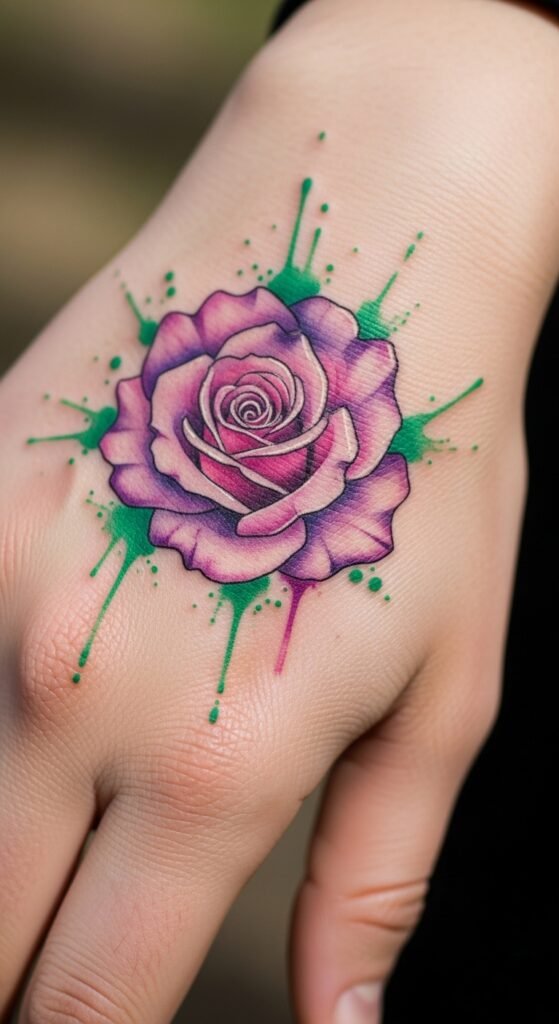
Watercolor rose tattoos mimic the appearance of brushstrokes. They’re perfect if you want something colorful without bold outlines. While they can take longer and cost more, a smaller version on the hand is manageable. Budget tip: choose a single bloom instead of a full bouquet. DIY planning: test color combinations on paper first, since skin tones affect how colors pop. Watercolor roses age beautifully if you protect them from direct sun.
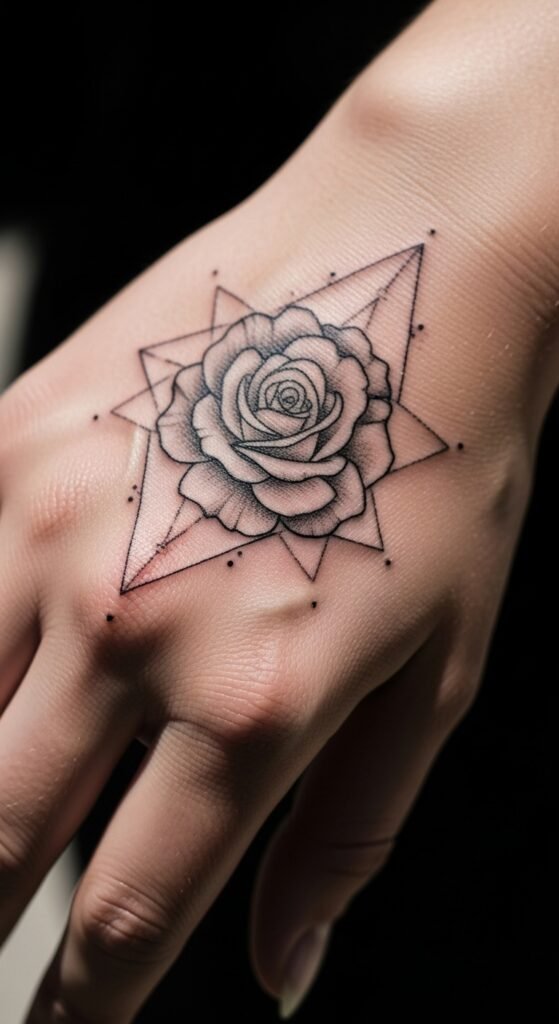
6. Geometric Rose Design
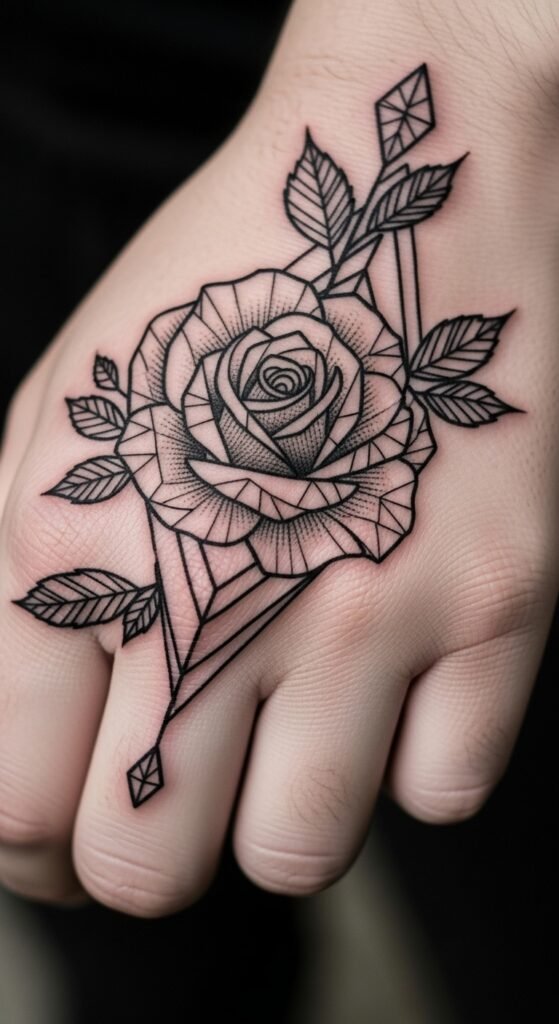
Geometric roses combine nature with clean lines. They often include triangles, circles, or polygon shapes around the petals. Small geometric touches can make a tattoo feel modern and artistic. Budget-friendly approach: limit geometric elements to outlines and fill with minimal shading. You can DIY by sketching polygons over a printed rose photo to experiment before the artist inks it. Placement on the back of the hand or near the thumb works best for visibility.
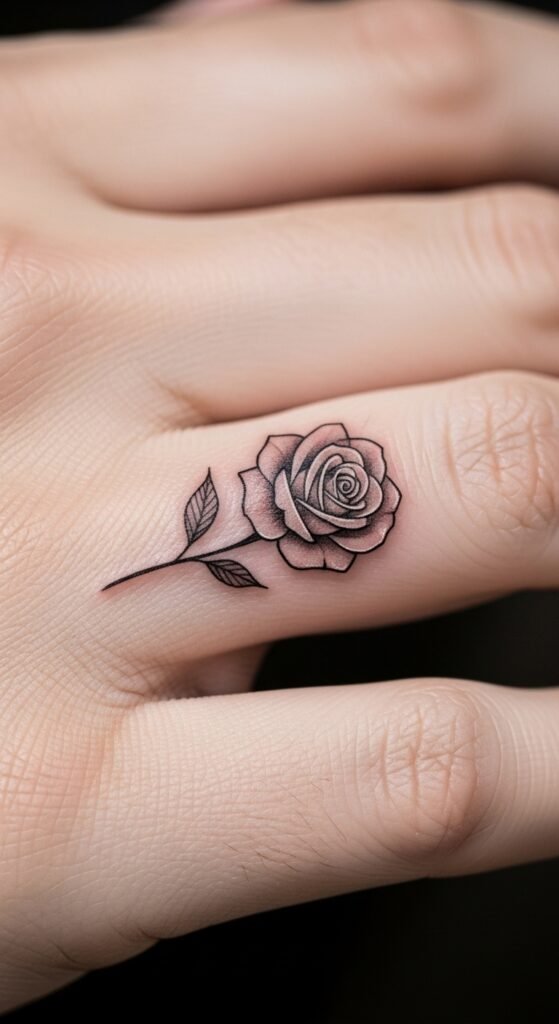
7. Finger Band Rose
A finger band rose acts as a natural accessory. It’s delicate, subtle, and easy to maintain. Because of the small size, it’s affordable and fast to ink. For DIY prep, draw the vine on your finger with a washable pen to check fit. Black outlines are low-cost, and adding tiny color later is optional. This style works for rings, marriage symbolism, or just personal flair. It’s elegant without being overbearing.
8. Rose and Butterfly Combination
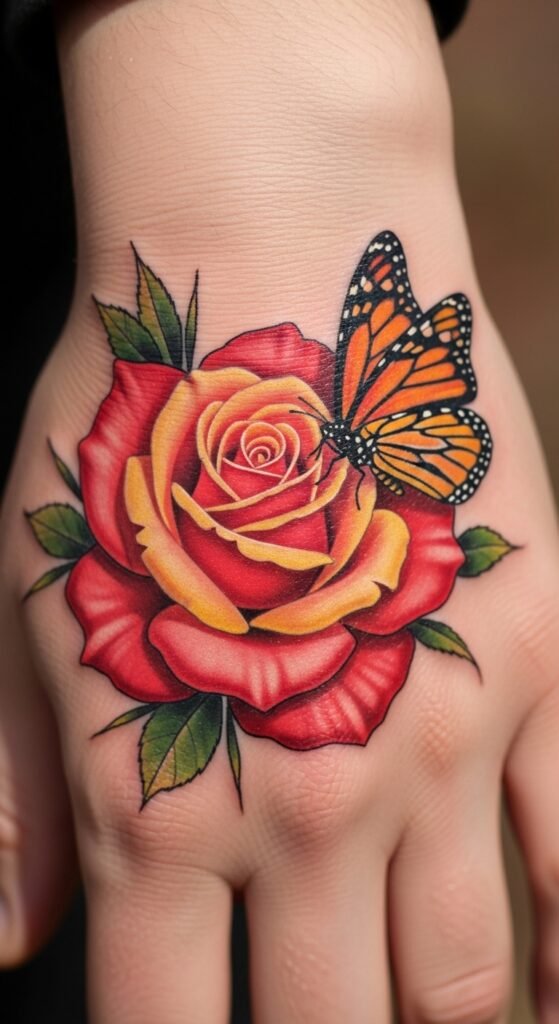
Combining a rose and butterfly adds life and movement. The butterfly can symbolize freedom, while the rose represents love or growth. Budget tip: focus on one butterfly with one bloom instead of multiple elements. DIY planning: cut out paper stencils to test layout on your hand. Colors can be subtle or vibrant, but even black-and-gray designs look striking. Placement near the wrist or center of the hand enhances visibility.
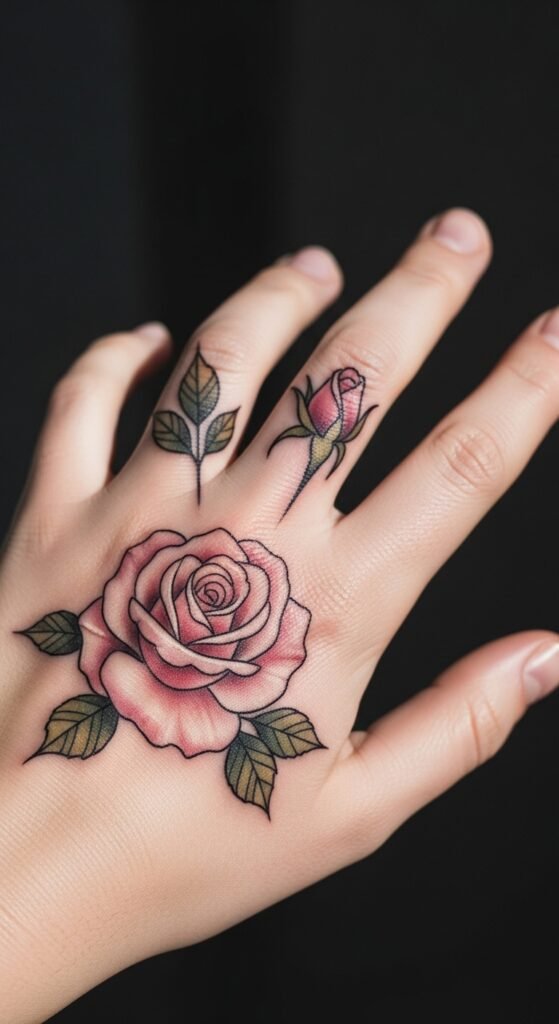
9. Small Rose Cluster
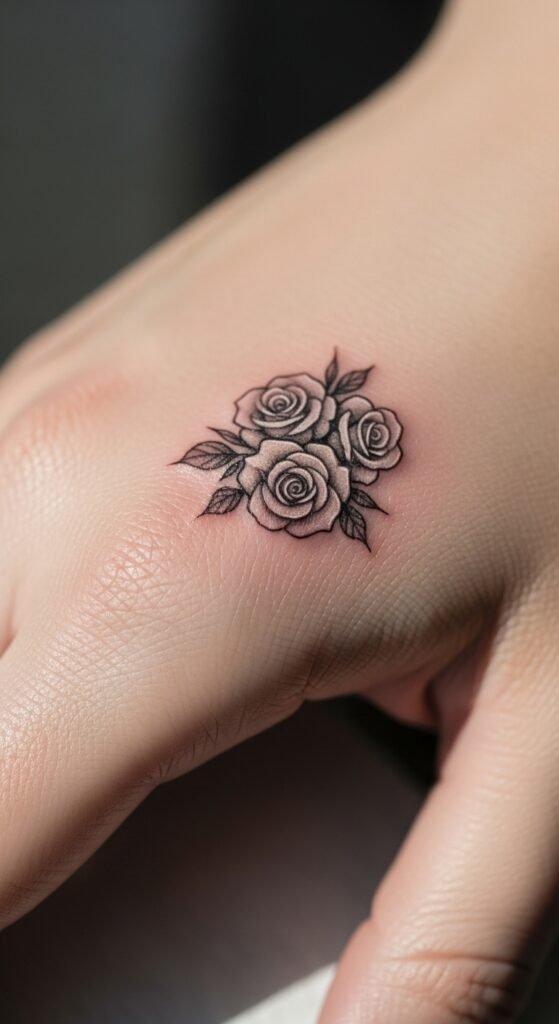
A small rose cluster creates a compact, elegant effect. It works for the hand, fingers, or knuckles. Keeping designs small reduces cost and healing complexity. DIY tip: arrange temporary stickers on your hand to visualize spacing. Black or gray shading is subtle, while minimal color adds personality. This style allows you to extend into a sleeve later without redesigning existing roses.
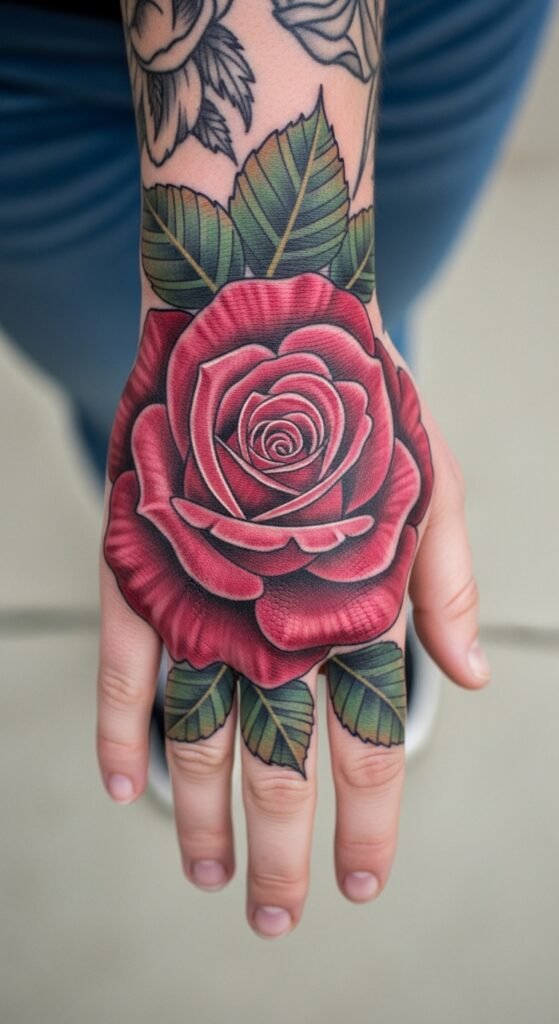
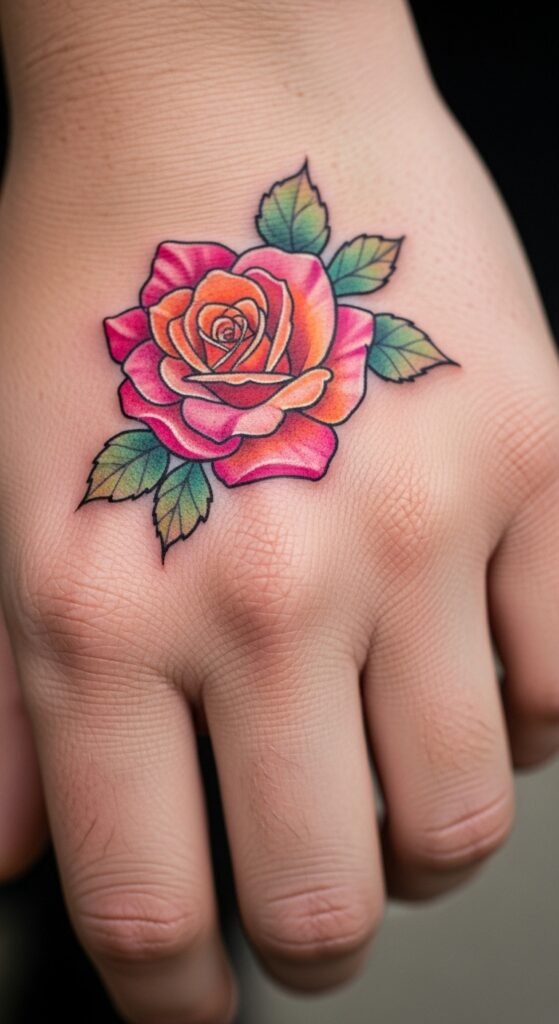
10. Single Large Red Rose
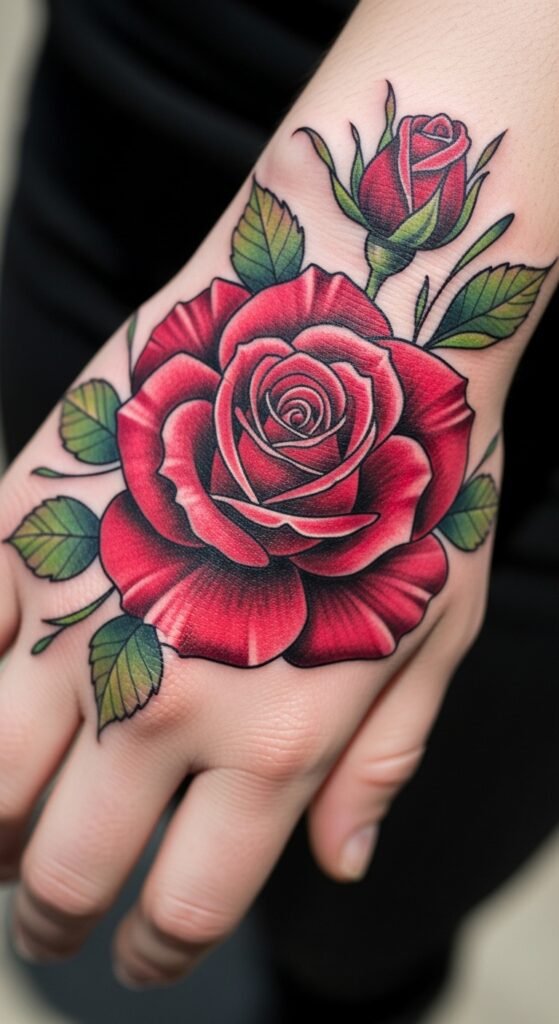
A single large red rose is bold and classic. Ideal for people who love traditional tattoo aesthetics. To save money, consider black outlines with only partial red shading instead of full color. DIY planning: measure your hand and draw a scaled rose to match hand dimensions. This style suits the back of the hand or a central palm design. Regular moisturizing keeps colors bright.
11. Rose With Script
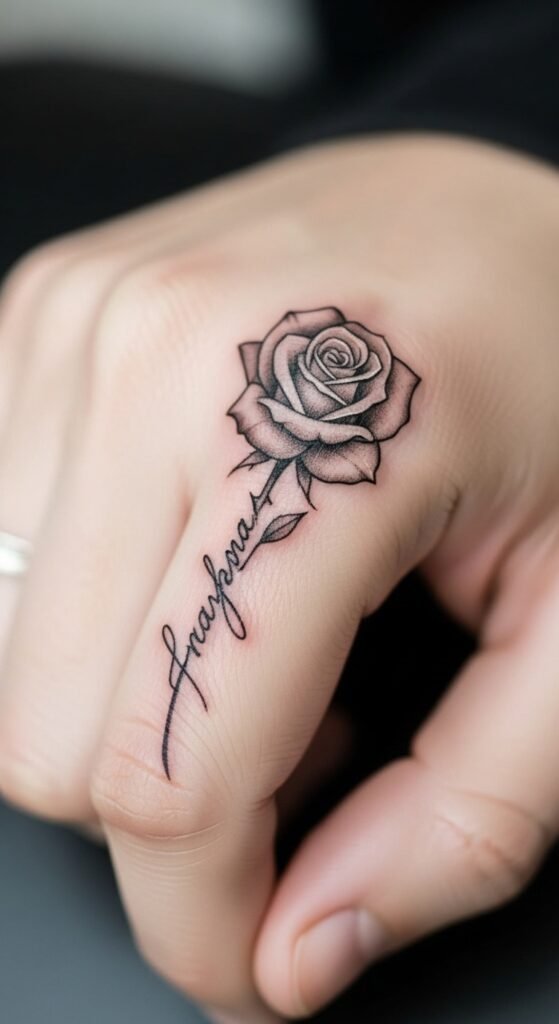
Adding script to a rose tattoo personalizes it. Choose meaningful words, dates, or initials. Keeping the font small avoids overcrowding. Budget tip: ask your artist to combine rose outline with fine script in a single session. DIY: practice writing on paper over a printed rose image for spacing. Placement along the side of the hand or near the wrist makes it visible yet discreet.
12. Blackwork Rose
Blackwork roses are bold, dramatic, and low-maintenance. Pure black ink ages well on hands, reducing touch-ups. You can make a single rose or a small cluster for maximum impact. Budget tip: large blackwork designs are faster than multi-color tattoos. DIY preparation: trace your design on paper and mark hand placement to visualize the impact. This style fits modern or edgy aesthetics.
13. Tiny Rose Near Wrist
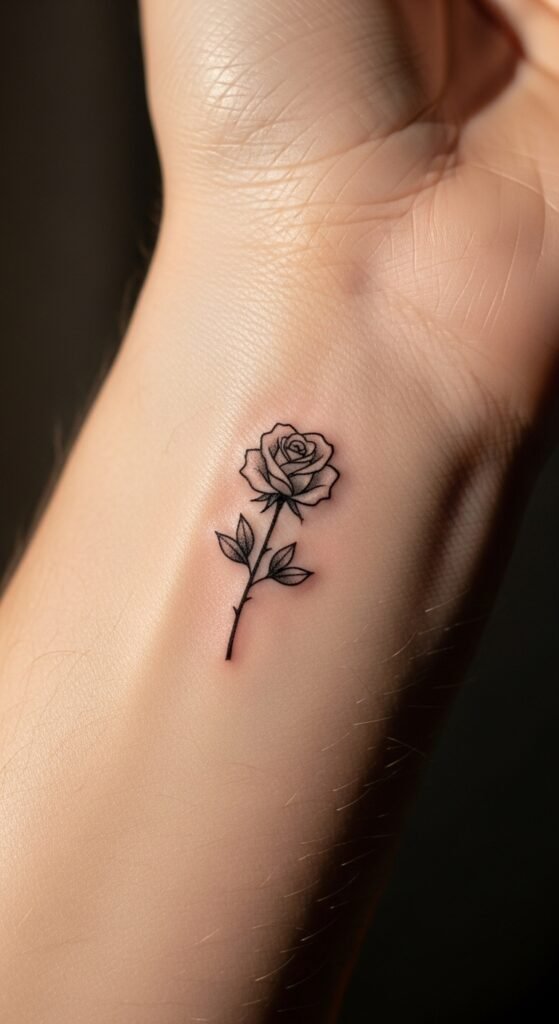
A tiny rose near the wrist is subtle and elegant. It’s ideal for first-timers or minimalistic lovers. Placement allows for concealment if needed. Budget tip: small tattoos are quick and inexpensive. DIY: use a washable pen to try out positioning and ensure comfort. Simple black outlines with tiny shading keep the design affordable and easy to care for.
14. Knuckle Rose Tattoo
Knuckle roses are bold yet minimal. A single rose per knuckle or a small vine connecting multiple knuckles works beautifully. Budget tip: one-session ink keeps costs down. DIY prep: use temporary markers to check spacing and alignment. This design is edgy, draws attention, and pairs well with other small tattoos on the hand or fingers.
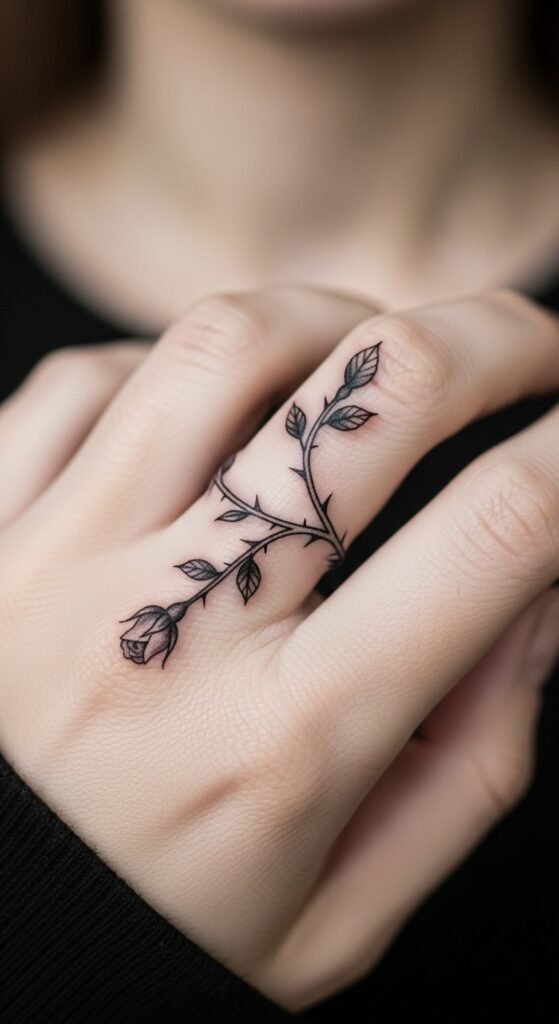
15. Rose Vine Along Side of Hand
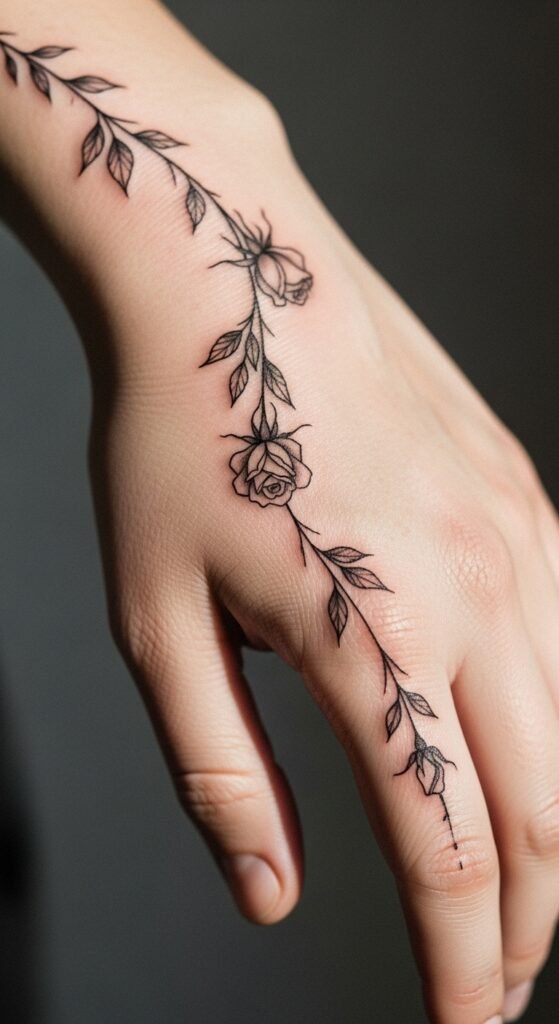
A rose vine along the side of the hand adds elegance and flow. It’s ideal for elongated hand shapes. Budget tip: request a single outline first; coloring can be added later. DIY: sketch on tracing paper and wrap around your hand to check natural flow. This tattoo style blends naturally with fingers and wrist, giving the impression of organic growth along your hand.
16. Tiny Rose Between Fingers
A tiny rose between fingers is playful and intimate. It’s discreet yet stylish. Small size keeps the price low. DIY tip: try finger placement with temporary tattoos or stickers first. Black outlines with light shading are easy to maintain. This design suits anyone wanting a subtle, sweet touch on their hand.
17. Rose With Leaves Spread
Adding spread leaves enhances the tattoo’s visual impact. A single rose with wider leaves looks larger without adding extra blooms. Budget tip: black and gray shading saves cost while retaining depth. DIY: sketch leaf placement on paper and fold over hand to simulate flow. Placement across knuckles or back of hand makes the design striking and elegant.
18. Rose With Geometric Background
Rose with geometric background balances softness and structure. Minimal shapes behind petals accentuate the bloom. Budget tip: geometric elements can be light gray, reducing tattoo time. DIY: overlay tracing paper on rose design to plan geometry. This style modernizes a traditional rose and works well on the back or side of the hand.
19. Small Colorful Rose
A small colorful rose adds charm without overwhelming the hand. Budget tip: limit to one bloom and small leaves for affordable color work. DIY: experiment with watercolor pencils on paper for preferred shades. Placement near the wrist, thumb, or finger tip enhances visibility. Even subtle hues make the design pop and feel lively.
20. Rose With Dots and Highlights
Adding dots and highlights gives dimension and uniqueness. Fine dots around petals or leaves create texture, while white ink highlights add depth. Budget tip: dots take less time than full shading. DIY: practice dot placement on paper to simulate effect. This style works for black-and-gray roses and keeps a simple design visually interesting.
21. Realistic Mini Rose

A realistic mini rose captures delicate detail in a small space. Budget-friendly approach: opt for black and gray for longevity and affordability. DIY: take a high-res photo of a real rose and trace its outline for planning. Placement on fingers or the back of the hand ensures maximum visibility. This style is perfect for art lovers wanting precision in a small design.
22. Rose With Vine Wrap Around Wrist
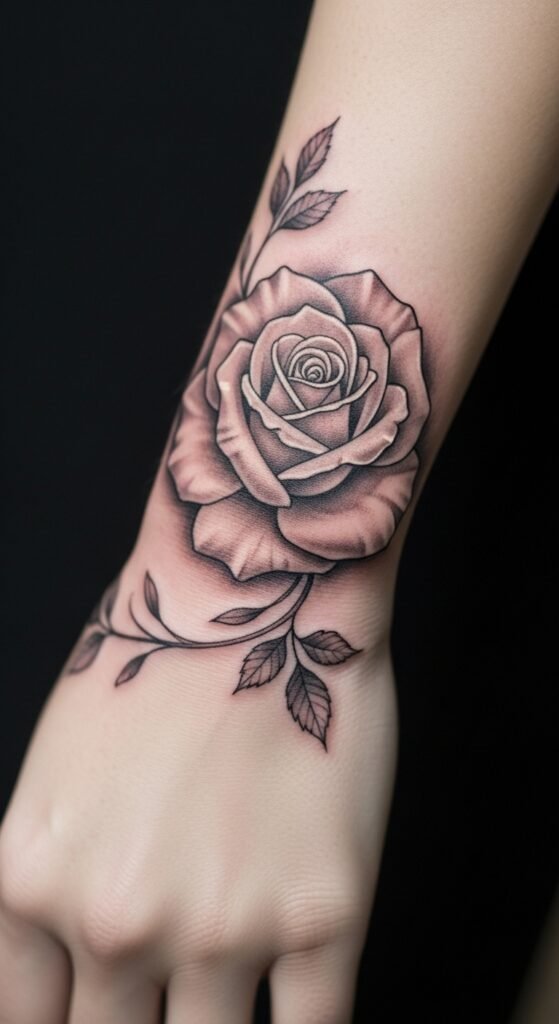
A rose vine wrap around the wrist blends hand and wrist elegantly. One bloom with flowing vine can be extended later into a sleeve. Budget tip: one session for outline first, coloring later. DIY: trace a paper stencil to visualize the vine around your wrist. This design is flexible, looks natural, and allows you to expand the tattoo over time.
Conclusion
Rose hand tattoos remain timeless because they combine elegance, symbolism, and versatility. From tiny minimalist designs to bold full-hand blooms, these 22 ideas provide inspiration for every style and budget. Whether you prefer black outlines, colorful petals, or subtle shading, a rose tattoo can transform your hand into a canvas of personal expression. Pick a design, plan placement, and take small steps—your perfect rose hand tattoo awaits.

Leave a Reply